Yes, I know that I am a hand tool neanderthal, and I really love using them. I also still have a yen for manually focused SLR lenses too, but that is another story. Folks are sometimes surprised to find that I occasionally watch television, and yes there is a small TV in the back room so that the grand-kids can watch Kung-Fu Panda and the Ice Age series.
Thing is, the back room is used for so many tasks - sewing, spare bedroom in a pinch, the retreat that provides a quantum of solace when the house is hectic, as well as that place that all the lego can be left out for days while imaginative building projects take shape and form - and games are invented around the masterpieces of construction.
So the TV has to be movable - and it should be small enough to push out of the way when the kingdoms of imagination need room to grow.

A low be-castored table is my answer to this conundrum.
The LOML wants timber that is light in colour, so no rosewood or Australian cedar thanks very much. I love working with camphor laurel, but no, something more plain this time.
I have found a plank of tea tree that will serve well. I've never worked with this timber before, and I am interested to see how it responds to my tools and my patience.
This plank is straight from Mal Ward's Botique Timbers, and is still fairly rough.
First step is to mark out what will be the various parts of this simple construction.
The plank is far too large to be cut with my power tools, and anyway I love a chance to use a good handsaw.
This is a lovely "old" Sandvik, so beloved of my cousin David, who swears by them. I am not too fussed on the plastic handle, but he is right about the saw - it went through this hard timber like a hot knife through butter. Note the kerfs from both edges meeting in the middle - to stop the weight of the plank splintering the edge.
Next step is to true up one edge as a reference for all the further cutting that will be necessary. First - the trusty Carter number 5 jack plane to remove all the rough and unruly parts of the edge. Finish up with a Lie Nielsen low angle jack. If the pieces were longer I would have reached for the Stanley number 7 or 8, but this time a number 5 will suffice. Lie Nielsen uses American cherry for their handles - it is amazing how dark this timber can become as it ages. Compare mine to a new plane handle here.
This little table will have an open front, two sides, a shelf and a top - all braced by a partial back that leaves room for the cables and power cord. Joints between the various parts will be partially housed and will have through tenons, to add a touch of Greene and Greene to the design.
The top is a straight rectangle. Both sides, the back and the shelf will all have tenons cut which will project through the panel that each will interface with. Sounds complicated, but it's not.
Here is the shelf. It will have two through tenons at each end, and a short (3/16") stub tenon between them that will sit in a shallow housing. The stub tenon can be seen marked in this image and the first picture below.
The second image above shows the cut after the corner of the shelf has been removed. I cut just inside the line and will pare back to the line with a paring chisel.
I did this, as this edge sits flush with the side and I wanted to avoid saw splintering here, and there is no housing at the front (or the back) to spoil the line of the front edge of each side panel. Hope that makes sense - if not, keep watching and you'll see what I mean.
Before cutting down the grain, I often line up the workpiece so that it is square to the vice - helps keep the saw cut straight.
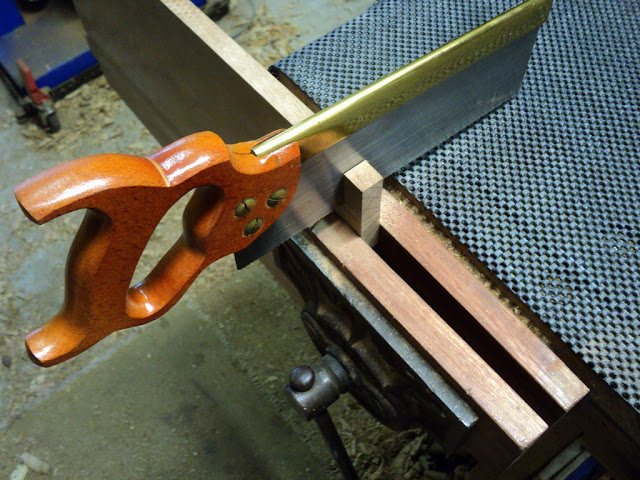
Since the cut is essentially a ripping cut along the grain, a rip dovetail saw works best. This is a little Lie Nielsen 15PPI that works very well.
Paring the endgrain back to the scribed line takes a sharp chisel. This one does the trick.
Cutting out the waste between the two through tenons can be done easily with a coping saw. A jigsaw or a bandsaw would be quicker, but we're not in a hurry today. Notice that I am only cutting down to the level of the stubby tenon that will sit inside the housing. Not too fussed on cleaning this up with a paring chisel, as this will not be seen.
Cutting out the corners means sawing across the grain. I was lazy and tried the dovetail saw, which sometimes works OK. Not this time. The timber has all sorts of swirling grain and the rip dovetail saw kicked and bucked like a mule. The tenon saw handled it easily. This is a Tyzack.
Here is the finished shelf. Notice the through-tenons at each end.
The back will look almost the same - just smaller.
The two sides will have through tenons only at the top..
I'll get those done next time, as well as cutting the through-mortices and the housings.
Happy shavings to all.


