Life in the Village and beyond, based around the interests of my life.

Life in the Village and beyond, based around the interests of my life. Sunset at Telegraph Point.

Tuesday, June 16, 2015

Making A Carry Case For a Large Format Camera Part 2

The lid and base for the box are rebated around the edges to allow them to be housed in the carcass.


The glued up box is dry, and the dimensions of the lid are marked out along the sides as a guide for the saw.


Note that I am careful to mark through the middle of the tails as they have the longest registration and will remain sturdy after cutting.


The lid is part cut on the tablesaw.  I only cut about 3/4 of the way through to keep the carcass intact -  and then finish it off with a handsaw.


Here I am using my Spear and Jackson 10 point panel saw which is perfect for this little job.


The separated lid and the body now need their mating edges cleaned up with a plane to eliminate the saw marks.


Either the lid or the carcass now need a stepped seal to help them mate when closed, and to provide a barrier against dust and moisture.


I have chosen to do it to the lid as I don't want this lip to impede the placement and removal of the camera when in use.


The stepped seal is simple - mitred at the ends and glued into place.


This has to be rounded slightly at its outside edges - particularly the front -  to make closure easier.


I will use a piano hinge for strength, as the hinge will have to bear part of the weight of the box and its contents when it is carried.


Clasps are simple stainless steel snap locks - I found mine on ebay.


In part 3, I will show how I lay out the inside to support the camera and its parts.

Happy shavings to all.

The Wooden Letterbox

Making the Letterbox

Good friends of ours wanted a new letterbox - nothing fancy - just a functioning letter box.
They even provided a fully detailed engineer's drawing.
(which I have misplaced, but will post here when found)

Here we go.


Made from recycled timbers sourced from far and wide.
The ship-lap boards are western red cedar from my brother in law's renovation and the remaining parts are alpine ash from a reclaimed bed-head.


Hinged forward using brass hinges.  The salty air at the address necessitated some corrosion protection.


The sides of the letterbox hang down below the base so that rain does not cause rotting problems to the floor of the letterbox.


The roof overhangs the body on all sides to provide a constant self draining design that doesn't impact the sides.
And here is the finished article all mounted on its post.


The choice of finish for a salty environment is tough gloss acrylic paint - inside and out.
The existing number and newspaper holder were retained.  And they are sheltered from the elements.
Happy shavings to all.

Thursday, June 4, 2015

Making A Carry Case For a Large Format Camera Part 1

Large format cameras are something of an anachronism in these days of high definition digital imaging, however they have their devotees and disciples.
They are big, cumbersome and require lots of bits and pieces - as well as a sturdy tripod.

I am going to make a carry-case for the safe storage of one of these - my Toyo-View 45G.
Currently it is still in its original cardboard and styrofoam box, but these are deteriorating and certainly won't stand up to being carted around outdoors.


Here is a how to:

I have selected some meranti - pacific maple - for its strength and lightness.


Edge glue some boards to make lumber of the appropriate width.


When the glue is dry, true one edge as the reference edge from which the sides will be cut square.


The six sides of what is essentially a box are laid out prior the cutting the dovetail joints for the sides and ends.


I use a Gifkins Jig to cut the tails for the dovetails first.


The completed joints look like this.


A trial fit of the carcass without top or bottom fitted.

The top and bottom will be cut out and rebated into the carcass and the whole lot glued together.
When dry I will cut off the lid on the tablesaw.

More to come in part 2

Thursday, April 2, 2015

Centenary Of ANZAC Honour Board

On the 25th April 1915 members of the Australian and New Zealand Army Corps landed at Gallipoli in Australia's first action as a nation in war.  The campaign, conceived by the British, was an ultimate failure - but it is inscribed into the hearts of Australians, New Zealanders and Turks alike as story of courage, sacrifice and mateship.

 Anzac Cove at Gallipoli

25 April is a national day in Australia, New Zealand and Turkey for much the same reasons, and our countries have grown to be close friends.

 A Turkish soldier carries a wounded Australian

This year marks the centenary of Anzac and all three countries will mark the occasion with ceremony and solemnity.

The profound words of reconciliation from Mustafa Kemal Atatürk

 I was commissioned by our Community Association to build an Honour Board for those names of men who served that were omitted from the original Honour Board of 1919, to mark the end of World War 1.

Telegraph Point Original Honour Board from the end of WW1

The new Honour Board is to house an additional twenty names, and to be made in the same manner as the existing memorial.

I chose Australian Rosewood, as the colour will match the original timber colouring in time.


Only having the current board to work with, there had to be many measurements taken to try to replicate the size and appearance.  All together there were over 130 individual parts that had to be made, cut, shaped and moulded.


I won't bore you with the slabbing, sizing or general fabrication.
The carcass was straightforward but the clamping of the individual mouldings created a challenge.  There are 24 moulding pieces at the bottom of the columns alone.


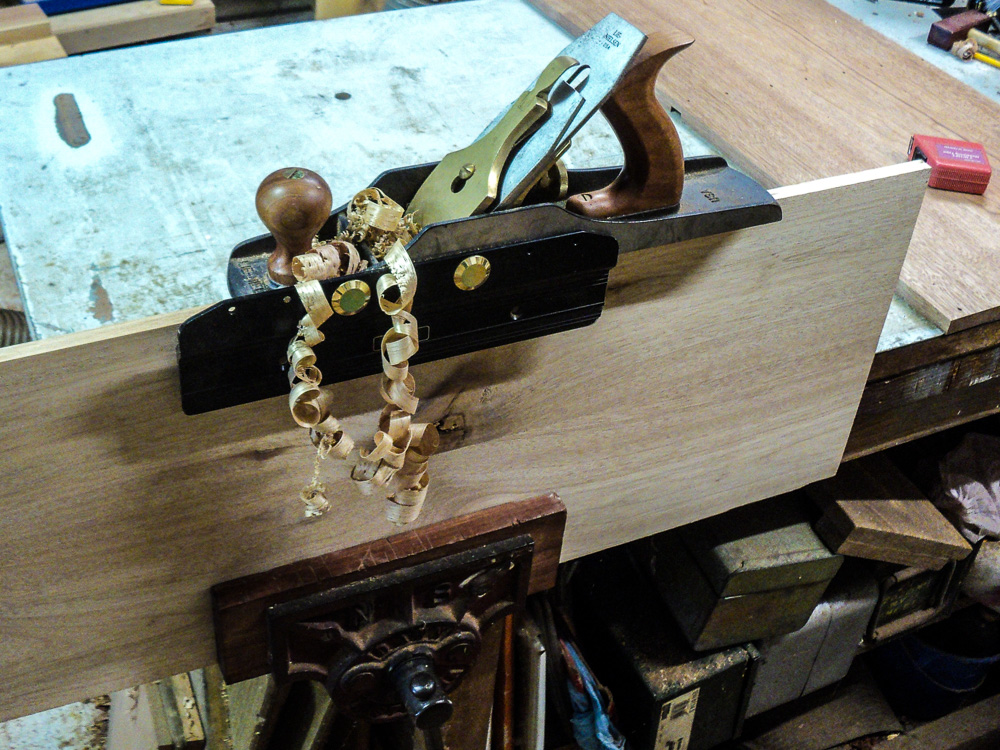
I hand made all of the mouldings using a combination of blades in the Stanley 45.
The construction picks up at the making of the pediment.


Each block and piece of moulding was cut in a home-made mitrebox.  The pieces were too small to be safely cut on the dropsaw.


The combination of mitred panels and moulding made up the top of the pediment.


You can never have too many clamps


You really really can't have too many clamps


Here is the completed construction before final sanding and finishing
The box section between pediment and carcass is hollow, so I decided to include a time capsule from 2015.  Maybe at some future time it will again see the light of day.


By using a mobile low trolley made from scraps, I was able to have the finished piece at a suitable work height for sanding and final lacquering.


The finish here was sprayed on Mirrortone satin.
All done now - and ready for the sign writer.


The finished board had to be sent off to the sign-writers for completion.  It took several months for the job to come to fruition.
Here is the finished Honour Board ready for display at this year's Anzac Day.


Monday, November 17, 2014

Where Do You Get Your Lumber?

A question that we all have to address as woodworkers is one of supply.
Where do we source our timber?
This is a question that I am often asked, and as recently as this morning I fielded a telephone call specifically on this topic.
The obvious places, such as hardware stores and trade timber yards are fine for construction projects, but the choices are limited and prices are high.
My own experiences might be a help in guiding others to find cheaper outlets with wider variety.

Side-o-road-iata

This is a generic "species" term that all my woodie mates use to describe "found" timbers.  The species vary - but usually include branch loppings, storm damaged trees, the results of noxious tree removal, or maintenance clearing.
We have a beautiful timber here on the coast called camphor-laurel, that is a declared noxious tree and is slated for removal everywhere.  This is often available free for the collecting.
I usually keep a lookout for this kind of timber, and people know that I am interested in their tree loppings from yard clean-ups as well.

Eucalyptus train-iata

Our club house - Hastings Woodworkers Guild - is situated in Timbertown, Wauchope and this hosts a working steam train.  Daily, this steam engine uses eucalypt offcuts from numerous mills in the area.  I have lost count of the number of times a beautiful piece from the log-pile has been turned into a box or a bowl.
There are numerous wood-heaps around that are either firewood, demolitions, furniture factory offcuts etc.  All of these can yield timber for small projects.


Mills and Lumber Yards

The numbers of these wonderful hives of industry are shrinking, but there are still timber mills to be found if you look.
They are worth the drive as the selections are wide and the prices are better than retail.
We are lucky enough to have several mills within an hour's drive of here, and the outing is an experience to be savoured.

Here is a one-day outing that we did recently to Botique Timbers of Rollands Plains.


A 50HP bandsawmill makes short work of slabbing this camphor-laurel log.


 Some of the club members add scale to the size of the milling equipment


At Botique Timbers, the slabbed lumber is air-dried in the open - usually covered in old galvanised iron sheeting.  This leads to some interesting warping occasionally, but the timbers are normally surprisingly straight and stable.


Burls - yes there were plenty for the bowl turners to select from.  These are normally sold by the kilogram - unlike the slabbed lumber - which is sold by the usable super-foot, or board-foot as our US cousins call it.
This is a quirky mix of metric and imperial calculations, but we have learned to be at home with them.


Advice is freely given and discussion often ensues ..........


...................... disagreements are handled with diplomacy and skill .................


 A close-up of the bandsaw mill in action - here it is just finishing the cut as the log slides past it.


Discussions about the merits of an unknown timber can arouse interest.  This is a piece of snakewood which became very popular after the briefing ................


I source much of my timber from this mill, as it is only about a half hour from my home and I have known Mal - the owner - for over twenty years.  This outing, which I organised for the club members, might just see them coming back for re-supply of their own timber needs.

I came home with a few lovely West African makore boards and some hairy oak.

A great day indeed

Friday, November 7, 2014

130,000 Visitors - How did this happen?

Time and Tides

Time has passed - three years now - as my woodworking has developed alongside music (ukulele) and a renewed interest in photography.
Serendipitously, it was the photography of the items and processes that I have written about, that re-awakened the photography genie.
It has long been an interest and at times a passion - from my first serious camera - Canon FTb - to the present.

I have tried to share aspects of my own life journey that I thought interesting enough to post.
Of course so much has been omitted.


An accidental introduction to ukulele three years ago has blossomed into a weekly jam, uke-making and several concerts - the next on November 30.


Photography has taken me back into the companionship of fellow shutter-bugs, competition and judging.


And my woodwork morphs around these interests, my family, grandkids and life in general.
Last weekend my youngest son married the love of his life and it was a celebration of family, friendship and hope for the future.


Life always has its ups and downs, but the secret to happiness is - in my view anyway - quite simple:

Have someone to love,
Have something meaningful to do,
and ...........
Have something to look forward to

May your journey be as rewarding as mine, your joys memorable and your problems small.
Happy trails
Tom