Life in the Village and beyond, based around the interests of my life.

Life in the Village and beyond, based around the interests of my life. Sunset at Telegraph Point.

Friday, February 22, 2013

Timbertown - An 1800's Experience


Our Hastings Woodworkers Guild Workshops and Clubrooms are situated in Timbertown - the historic 1800's theme village at Wauchope NSW.
 
While we are not busy with club projects or clubroom duties, it is a joy to wander the village and encounter the characters who enliven the day to day.


Bullocky

an extract
Beside his heavy-shouldered team 
thirsty with drought and chilled with rain, 
he weathered all the striding years 
till they ran widdershins in his brain: 


Till the long solitary tracks 

etched deeper with each lurching load 
were populous before his eyes, 
and fiends and angels used his road.


All the long straining journey grew 
a mad apocalyptic dream, 
and he old Moses, and the slaves 
his suffering and stubborn team. 

Then in his evening camp beneath 
the half-light pillars of the trees
he filled the steepled cone of night 
with shouted prayers and prophecies.

While past the campfire's crimson ring 
the star struck darkness cupped him round.
and centuries of cattle-bells 
rang with their sweet uneasy sound. 
From Judith Wright http://www.poemhunter.com/best-poems/judith-wright/bullocky-2/

The Village Blacksmith
an extract

Under a spreading chestnut tree
The village smithy stands;
The smith, a mighty man is he,
With large and sinewy hands;
And the muscles of his brawny arms
Are strong as iron bands.


His hair is crisp, and black, and long,
His face is like the tan;
His brow is wet with honest sweat,
He earns whate'er he can,
And looks the whole world in the face,
For he owes not any man.

Week in, week out, from morn till night,
You can hear his bellows blow;
You can hear him swing his heavy sledge,
With measured beat and slow,
Like a sexton ringing the village bell,
When the evening sun is low.

And children coming home from school
Look in at the open door;
They love to see the flaming forge,
And hear the bellows roar,
And catch the burning sparks that fly
Like chaff from a threshing-floor.


Toiling,--rejoicing,--sorrowing,
Onward through life he goes;
Each morning sees some task begin,
Each evening sees it close;
Something attempted, something done,
Has earned a night's repose.


Thanks, thanks to thee, my worthy friend,For the lesson thou hast taught!
Thus at the flaming forge of lifeOur fortunes must be wrought;
Thus on its sounding anvil shaped
Each burning deed and thought!
 From Henry Wadsworth Longfellow http://www.readbookonline.net/readOnLine/1218/


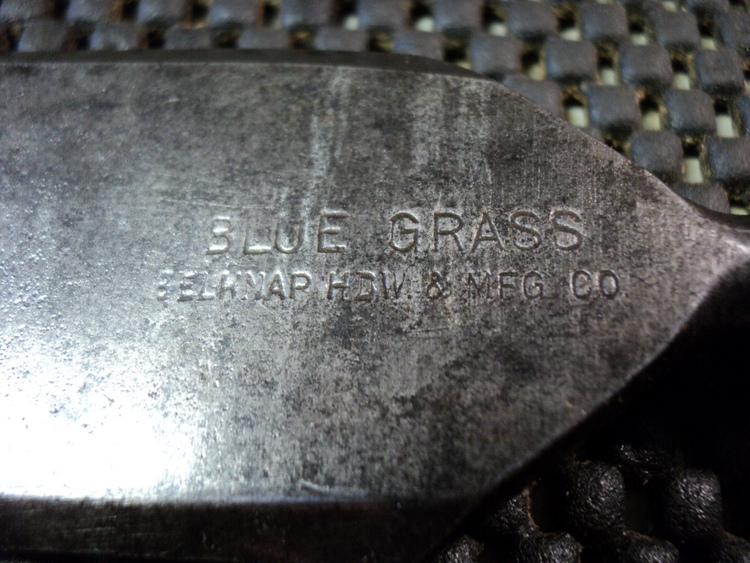
With special thanks to Craig the Bullocky and Doug the Smithy from Timbertown

Monday, February 4, 2013

A Value Far Beyond Pearls - Old World Chisels

Yep - Old Tools time again.
By now you will know that I have a relationship with old hand tools that permeates my woodwork.  And from time to time I wax lyrical about them.

Anyhoo, years and years back - can't remember when, it may be decades by now, I acquired one chisel among a few others, that I liked immediately, and have used ever since. It is a Mathieson bevelled edge with a lovely fine blade.

Ever since, I have kept looking for others - and every few years or more, another has come along.

On Sunday, I found another, and now have a grand total of four.
These are 1/8, 1/2, 5/8 and 1-1/4.
The handles are a joy to hold, and the steel is very good.

Alex Mathieson - Glasgow - made hand tools from 1822-1966.  Just when these particular four chisels were made is unknown to me, but I'd like to think that they are either late 19th or early 20th century tools.

The handles are beech, and brass ferrules guard against splitting - as these are tanged bevelled edge chisels.  They are excellent paring chisels, the shape of the handle aiding their dexterity.

Having shared my find with some friends, the subject of American chisels came along, specifically in relation to trying to identify trade marks stamped on the chisel face or socket.

This is the one that sparked the discussion, and next to it, what it would have looked like in its younger days:


Specifically: Union Hardware Co - Torrington Connecticut
It occurred to me to post some more of the American made chisel logos to assist in identifying troublesome and hazy trade marks in the future.
So - here they are.

Chisels Manufactured in the USA
Brand and Trademark

Of necessity, this will be a work in progress as I do not have access to all the possible trade marks and logos - there are hundreds.  It is but a start.


Blue Grass by The Belknap Hardware & Manufacturing Co


D R Barton - Rochester NY - One of the best


Douglass Manufacturing Co - Precursor to The James Swan Co - and as good as ...


Greenlee - Rockford Illinois


C E Jennings & Co


G I Mix & Co


And ........


Peck, Stowe & Wilcox - later to become:


Pexto - along with P S & W - one of the best


Sargent & Co NY


Stanley - of course!  Of which there were numerous trade marks.


The James Swan Co - successor to the Douglass - One of my top two US chisel makers of all time.


L & I J White

Image courtesy of Nicholas Bourke - Gratias my friend
Winsted Edge Tool Works - aka Thomas Witherby


T H Witherby - The other of my top two US chisel makers of all time.

Well this is a start - I'll add to these marks as they come to hand.  In the meantime here is a small reference for those seeking clarification of US Chisel Trade Marks & Logos.

If you have any different logos or trade marks that you don't mind sharing, you can:


....it would be very much appreciated.


Happy chiseling
SG

Friday, January 25, 2013

Happy Anniversary Day

We call it Australia Day now - but according to Wiki...............

In 1888, all colonial capitals except Adelaide celebrated 'Anniversary Day'. In 1910, South Australia adopted Australia Day,[10] followed by Victoria in 1931.[13] By 1935, all states of Australia were celebrating 26 January as Australia Day (although it was still known as Anniversary Day in New South Wales).[10]

Whatever we call it - it is our 4th of July, our Bastille Day, our national day to celebrate our one-ness as the nation of Australia.  So happy Australia Day to all!


http://api.ning.com/files/0f615wLw7mk-g2V8jipuCmhOglNhnaZVUMDrhgNkVezNdZhEmHEJUE62Iz-Twel0mSC64Ex5UO4SbyROZv0mg2SvymkeyBya/GW_Australia_Day_Flag_Map.jpg


Twelve months ago, I highlighted the debt that we owe to past Australian tool manufacturers and the heritage that they have left us. See Oz Day 2012 

I thought that this year I would focus on one of our current woodworking tool manufacturers, and look a little more closely at his contribution to our craft.

HNT Gordon - Planemaker

Terry Gordon has been making planes in his Alstonville NSW workshop since the early 1990's and commenced trading in 1995.

He has always set for himself the highest of standards, and outlines these in his business principles:


Any plane we  make will be able to plane or scrape any wood without tearout 
We will only use high quality materials with a simple appropriate design to offer customers affordable quality in tools that will make your woodwork better. 
We have done considerable development work to learn how to harvest, dry and stabilise Australian hardwoods (in particular gidgee) to give give us a superior quality wood for plane making that has ever been used before.  In conjunction with this we have learnt how to combine this wood with brass using modern glues to enhance the function and life of some wooden planes.   As a consequence of this work we offer an unconditional guarantee on workmanship and materials without hesitation.
I have been using Terry's planes for many years, and have a fondness for them when using Australian hardwoods especially.
They are well suited to controlling tearout in these timbers, and leave an excellent finish.

Here is an HNT Gordon Trying plane - which is superb on a shooting board and excellent for board jointing.  I prefer it on shorter boards, but on very long boards I still reach for my Stanley Number 8.


Terry makes a range of Block, Jack and Smoothing Planes.  I have found that his work is so exact, that these planes all present with very fine mouths and take the finest of shavings.  To me, this makes them different varieties of smoothing planes, but of differing lengths.


Here is The HNT Gordon A55 Smoothing plane, and traditional Smoothing Plane.  Both are excellent - with wonderful blades and tight mouths to produce the whispiest of gossamer shavings.


This is Terry's Aussie Jack Plane, and it too is beautifully built.  It, too, takes the whispiest of fine shavings, and leaves a smooth finish.  It is, in my eyes, another smoother.  I use jack planes for thick shavings from an open mouth - so that the timber is removed quickly.  My Australian-made Carter number 5 is a great example of this, and far more useful as a Jack plane to me.


It is Terry's Shoulder Planes that really shine.  Here, the precise construction and fine engineering again give consummate control in relieving the shoulders of tenons and truing their faces.


From left to right - 1/2 inch, 3/4 inch, 1 inch and 1-1/4 inches wide shoulder planes.  These are different examples of the same timber - Macassar Ebony.  Below, a side view.


The range of handplanes made by HNT Gordon is extensive, and these have been but a sampling.  All are works of the toolmaker's art and are a pleasure to use.  Here is a broader  illustration of part of the range available from the planemaker's own website:

http://www.hntgordon.com.au/africanblackwoodset.htm

And in Snakewood:


HNT Gordon also manufacture a variety of specialty planes suited to the cabinetmaker and to the master craftsman.


HNT Gordon Dado planes are a work of art, and contain an adjustable nicker that is as beautiful as it is effective


Add to these, hollows and rounds, snipe bill planes and side rebate planes, and the field is well covered.  Terry is also producing both male and female dovetail planes - coming soon.

The images above courtesy of HNT Gordon

So Happy Australia Day Terry, and on behalf of the woodworking community, thank you for what you have contributed to the world of woodworking, and to Australian woodworking in particular, where you are best known.

For the rest of us there is the singular pleasure of using HNT Gordon planes and other hand tools that enhance our chosen craft.

Happy Australia Day to all................

Sunday, January 20, 2013

20,000 Visitors - Who'd-A-Thunk

When I started The Village Woodworker Blog, I had in mind the goal of presenting in a quiet way, the activities of a very small beer woodworker, who happened to have a yen for old tools and their application.

I have been humbled by the fact that so many of you have found the experience of visiting - to be a positive one.  Thanks for your continued support.

As you can see from The Village Woodworker Blog, I sell nothing and I do not list any advertising.

The Blog is an honest presentation of what happens in my life, in The Village of Telegraph Point and its environs, and this - more often than not - involves woodwork.

If, during your visits here, you have learned a little, or taught me a little, then - all to the good.

I hope that the future holds learning experiences for all of us, and that we are prepared to share them for the good of all.

Mucho Gratias my friends.                                                             Sunrise on a tallowood at Telegraph Point.


Clyde and Dale

Monday, January 14, 2013

Festive Season and Bar Stools - How To Repair a Broken Chair Back

Yes, I know what you are thinking, but no - it wasn't the result of intemperance.  Rather it was the accidental leaning-on-the-kitchen-bench and leaning backwards with the feet by one of the grandkids, that sent the stool crashing to the floor - with tragic consequences for the stool.

The spindles - sometimes known as bannisters - all snapped clean off, level with the seat.
And so ...... off to the workshop, and back to the woodwork.


The obvious solution was to find some matching timber and turn up some new spindles.  The original was made from a light coloured pine-like timber that had been given a golden stain.  I'm sure that I can find something to match from the wood cave.

Remaking The Back Of A Chair
First step is to round off the billet down to just a tad thicker than the widest part of the original.


Set the bead width near the middle and create the bead.

Taper from the bead back towards each end, and we are nearly there. Don't turn to final thickness yet in case the hole drilling goes astray and the holes are oversize.

The holes for the spindles are full of broken spindle ends and need cleaning out.

This tool is as ancient as it is useful.  No workshop should be without a hand brace and a set of augers.  No-one wants them anymore, so they are as cheap as chips at Sunday markets and garage/car boot (car trunk for our US cousins) sales.

They come in a variety of widths of the crank - the throw - the double of which is called the sweep.  This one has a small throw of around 3-1/2 to 4 inches.  So the crank, when wound, describes a circle of 7-8 inches - the sweep.  For tougher jobs there are braces with 10, 12 and even 14 inch sweeps.


These days we all use power drills, but there are times when a slow and precise re-drilling is needed


Re-drill the spindle holes in the seat.
I have chosen an auger bit that is slightly under the size of the original holes.  This leaves a small collar of residual timber that can be easily removed with a gouge.  Why not simply drill out all the waste in one hit - well, the auger bit may wander and the hole end up off centre.


The best gouge to use here is an incannel gouge, where the bevel is on the inside of the gouge and the curved back is straight all the way to the cutting edge.  This allows some precision in the gouge's use.
These two lovely gouges were made in Tasmania by Titan - one of Australia's best known and respected chisel makers from post World War 2.
Above, on the left - Titan incannel gouge, and on the right - Titan outcannel gouge.


Once all the holes in the seat have been cleaned out, it is time to tidy up the cresting rail.


All of the old dried glue has to be removed before the new spindles can be fitted.


The spindles are turned - down to the diameter of the originals - and then cut to length for fitting.

Here they are complete, except for final thicknessing and cutting to length.
The cleaned holes have exhibited some variations in diameter, so the spindles will be custom thicknessed to each hole.


The broken spindles are used as a length guide before final thicknessing and parting off.


I don't part off completely, but finish the job with a small saw.  This is a flush cut saw made by Veritas, but there are others.  It is useful because there is no set of the teeth on the left face of the saw blade, so it doesn't bind when cutting.


Fit the spindles and glue.
A coat of stain and a couple of coats of polyurethane, and we are done.


VoilĂ