When I was a little tacker, I recall Mum cooking up leftovers in the frying pan for Sunday night dinner. It was always called
bubble and squeak, even though it was never the same recipe twice in a row.
All I remember was -YUM!
Well, the leftovers that are coming together to make this cupboard will likely never be repeated, so I am thinking of naming it my
bubble and squeak cupboard.
I have settled on one shelf divider-cum-mullion, as this makes the best use of the materials that I have available, and generates the least waste.
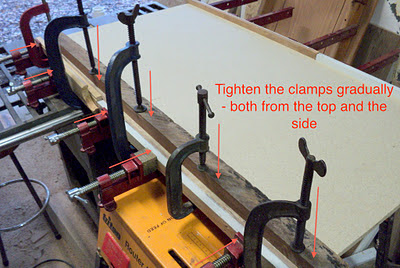
A couple of daggy old boards were glued together to create a panel wide enough to serve, but these needed some serious cleaning up afterwards.
I pulled out my low angle block plane - it's a little Millers Falls 56 - to clean up the glue line, and was enjoying the experience so much I just kept going - using it as a small smoother. The timber is sugar pine and meranti, so is as soft as butter.
Trimming to size comes next. While Disston Keystone saws were not exactly their premier line, this one is lovely in the hand, and cuts sweetly. Disston's advertisement for Keystones reads:
In Keystone made by DISSTON Hand Saws, the
Merchant has a good utility product - a line made in
grades that will appeal to home owners, farmers, stu-
dents and all others who are willing to pay only from
$1.00 to $2.35 for a hand saw.
........Hmmmmmmm, it says something about the quality of manufacturing at the time (c1935) when a utility line product is as good as this.
What the heck - I like mine.
The shelves will be supported in the middle of the cupboard by this mullion. It is too narrow to cut dadoes in both sides, so I have decided to use the time-honoured technique of adding cleats.
Measuring both sides is easily done by transferring the measurements from one side to the other. These have to match the dadoes that already exist in the two side panels.
The cleats are nothing more than some left over rippings from timbers used in making the bench. Because they are hardwood, and in thin strips hardwood is prone to cracking when nailed, I pre-drilled the nail holes. I used cut nails that I found deep in the nether regions of my collection of screws and nail-type things. I think that these were a legacy of an estate bundle acquired somewhere along the way. I know that nailing isn't even considered as a serious fixing method by some, but there are plenty of occasions when it works a treat.
A little of the woodworker's friend - old mate PVA - on the back of the cleats, and we are good to go. Clean up the excess glue with a damp cloth.
A simple nosing piece will cover the front of the mullion and hides the cleats from view. It also adds some visual width to the mullion - and you can't have too much visual width I always say.
Next steps will be the cutting of the shelves, and adding a facing to tart up the particleboard from which the shelves will be made.
Can't wait.


