The bench and tool cupboard project is coming together nicely. Today, the rear rail was mortised and tenoned, the top was prepared with a nosing piece, and the carcass took its first steps towards assembly.
First step was to cut the mortises in the legs with the trusty Makita. Unlike a traditional mortise, these will be open at the top because the brittle old hardwood disintegrated at that point when the router approached it. No matter, the particleboard top will be screwed in place and covers this quite well.
Next step was to cut the tenons in the rail. This is a very old Blakeley Tenon Saw that still cuts like a dream. Check out that kerf.
The roughed out tenons were then finished with a Stanley shoulder plane. This is an English made 93, and even though some poo-poo the quality of the English blades, I have found them to be fine in practice, and a joy to use.
With the rail glued in place and firmly clamped, it was time to add the shelf. This will be an open cabinet bench, where the shelf will keep things off the floor and out of the way. The front and rear have had a second thickness of particleboard added as stiffeners. These were offcuts anyway, and better used than discarded. Glued and clamped with spring clips, they will dry overnight.
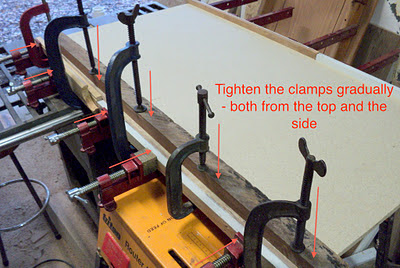
The particleboard top needs a nosing piece across the front to both protect the edge and to stiffen it. I have cut a rebate in a length of matching hardwood, and glued this to the front edge. Since this has glue faces at the front and underneath, it needs clamping pressure in both directions. Tighten the clamps gradually, a little at at time, working along the row of clamps in sequence to pull it in snug in both directions.
An end view shot shows the rebate, and the directions that the clamping pressure needs to move in, to snug this up good and tight. Good old PVA - what a great adhesive.
I can hear the rain tumbling down outside, and I am looking forward to tomorrow afternoon when I'll be ready to continue assembly.
Life is good!


No comments:
Post a Comment