Life in the Village and beyond, based around the interests of my life.

Life in the Village and beyond, based around the interests of my life. Sunset at Telegraph Point.

Friday, January 13, 2012

From Russia With Love

It arrived in a box of plane parts that I found at the markets one Sunday - many moons ago.  It was in pieces, and only by a process of elimination could I deduce which parts belonged.  Not that I recognised these parts, but I am familiar with Stanley, Turner and Record, so once those bibs and bobs were removed - this is what was left.

It's a cast iron smoothing plane - about the size of a Stanley Number 4.

Pretty it isn't - but was it functional?

I decided to have a closer look, make some observations, and then put it through its paces.

Who knows, it might just be that diamond in the rough.


 And, yes it is rough.  The lever cap is probably the worst example, but the finishing is very poor indeed.

It does what it is supposed to do, and holds the blade and cap-iron quite well.

Fortunately, the frog is better made and fits the base quite nicely.


The frog casting must have been made in a different foundary, on a different day, or by someone who cared for their work.

It is in a different league to the lever cap.  In spite of the paint, it sits the base very well, and moves smoothly forward and back with the frog adjusting screw.

The depth adjuster is made from steel and rotates easily.

So far so good.  It isn't until we turn the frog over that a couple of little problems arise.

The lateral adjuster lever is about as small as you can get away with, and is simply a bent and folded strip of steel. Initially, it sat just under the blade, swinging in the breeze.  It needed bending upwards at the bottom to engage the blade slot.
 The yolk that connects the depth adjuster to the slot in the cap-iron is a poor fit, and this leads to problems with the blade in use.

It is simply too skinny, and creates quite a lot of slop and play in the depth adjusting mechanism as a whole.

In use, it becomes absolutely imperative that the depth adjuster be in the forward position, to keep forward pressure on the blade.


The base is thick and solid, and feels heavy in the hand. It could be more to do with the balance of the plane than its actual weight, as it is about the same mass as a Stanley Number 4.

After the quality issues presented thus far, it was a surprise to see that the sides were square to the sole.

The mouth is generous, making adjustments for fine shaving a little tricky.


At first blush, the blade looks to be too short, but compared to a Stanley blade it has about the same length of blade below the slot.  It isn't exactly the same amount of usable blade however, as the lateral adjustment lever will run out of available slotting when the blade is about half used.  In the second picture, the back of the blade shows a line where the paint finish ends - it is about here that the usable blade will exhaust itself.


These days, we are accustomed to plane blades that are flattened at the factory and virtually ready to go straight out of the box.

Not this one!

In fact, the back of the blade was a mess of craters.  I spent quite some time attempting to flatten the lower part of the blade and discovered - thankfully - that it had a pronounced hollow. Had it been convex, I am sure I would have given up.  Flattened this far, the cap-iron had to be set close to the cutting edge to avoid shavings lodging between the irons.


At this point the cap-iron did not fit well enough, and left a gap between the leading edge and the blade.  It had to be flattened on the oilstone to eliminate any possibility of shavings jamming in between the two irons.

The handles are not pretty.  They are utterly utilitarian.

The rear tote feels chunky in the hand, and never feels comfortable.

Even though the right index finger can reach the depth adjuster, it doesn't want to - as this changes the position of the palm on the handle - and it simply feels awkward.


OK -  now to the money question - how does it perform?

Well, quite creditably on softwoods.  To be fair, it would likely not encounter Australian hardwoods in its own country, so it does serve the purpose for which it was designed.

The finish on the softwoods that I tried, was very good.

In order to close the mouth, the frog had to be screwed forward.  No problem in softwoods, but pronounced chatter from the blade in hardwood.
Stick to softwoods then.

The most annoying characteristic was the failure of the depth adjuster to hold the depth chosen for the blade.

The problem is the thin-ness of the yolk, and the amount of play that this introduces into the adjustment mechanism.

As a total package, this is not the diamond that we hoped it might be.
It's not a lump of coal either, even though parts of it look like they have been kicked around a mine for a couple of years.
It is what it seems - a product designed to do a job - no more and no less.  There are no bells and whistles, and there isn't the slightest attempt to add bling anywhere on this tool.

Would I buy one - no.  Would I use one - yes, if I had no other plane to turn to.


The bottom line is that good results can be had from this plane, as long as you are aware of its limitations.  It would make an interesting talking point in any workshop.  Fortunately, these planes are not that common in Australia.

Happy woodworking to all.

Sunday, January 8, 2012

That Mirror - Finished at Last

The lacquer has dried nicely and the frame ready to receive its finishing touches.


A piece of mdf around 3/16 inches thick was cut to serve as the backing, and to positively lock the plate glass mirror in place.
I cut it around an inch over the size of the mirror all around.


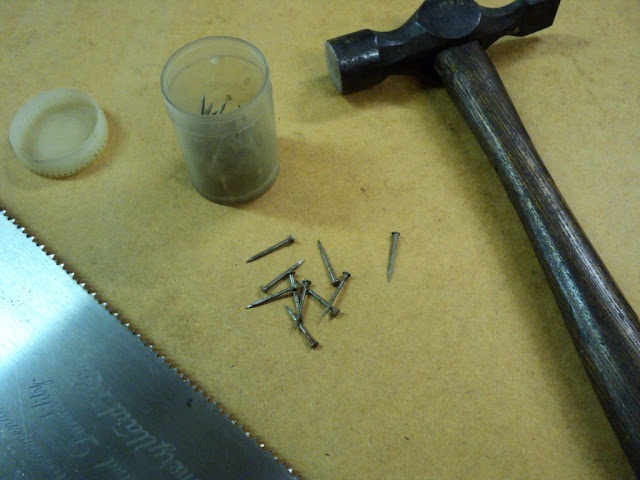
Small flat headed nails similar to tacks, but more like cut-nails were chosen, ensuring that they were shorter by about 1/4 inch than the combined thickness of frame and backing.


Since this mirror will be wall mounted, I chose a pair of adjustable hangers for each top corner and lined these up with the ends of the backing.

These will be sufficient to take the weight of the frame and glass.

They also allow for sideways re-positioning if there is any need for final adjusting.

Always good to have some latitude built into the hanging process!


So - there you have it.

All done and dusted. 

All it needs now is to be hung on the wall in the wardrobe.

Those other doors in the reflection are a restoration that is awaiting some extended rainy weather.

Babysitting for the last little while has been great - but - you know .....   not as young as I used to be .....

I think that the next project is going to be an outside task.
I have a gable end on the house that needs re-cladding, and a garden that is begging to be finished.

The driveway needs some more asphalt, and the fish are biting down along the breakwall.......


Decisions, decisions .......................


Happy woodworking to all.

Friday, January 6, 2012

The Bodgie Boys Are Back

We never tire of birdsong here in beautiful Telegraph Point.
Occasionally, however, we get unwelcome visitors.

These blokes are so cool and casual - never in a hurry to go anywhere - and even when they cruise past, they do so on lazy wings that seem to beat to a somnolent rhythm.


Yellow tailed black cockatoos are the vandals of the bush.
They hang in gangs and feed on grubs that they can hear inside the branches.  I'm not sure what the grubs are doing to make all the noise - maybe choir practice - but once detected they are cockatoo meat!


The birds have beaks that are the equivalent of the jaws of life - only, in this case quite the opposite.
They tear the branches apart piece by piece to access the grub a-la-cart.
This would be fine if that was the end of it, but for days afterwards the trees drop weakened branches - some up to two and three inches thick.
Ouch!


Over the last few years we have noticed a change in the migratory patterns of these birds.
Where, once before, they appeared in two and threes, now they are here in twenties and thirties.
I know these cool dudes have to eat - but, jeez fellas - clean up after yourselves!

Curses - the bower birds are raiding the grapes again.
Oh, the trials of living in paradise!

Thursday, January 5, 2012

Finishing the Wall Mirror

Yeah - I know - about time!
Been busy - you know - Life is what happens while you're busy making other plans .......J.L.
Nearly there on the wall mirror.
What contrasting timber to use to highlight the corners?
Found a piece of African Blackwood that will serve nicely.


Now this stuff is dense.  To work, it is something like a cross between bakelite and polyethylene.
But - what a beautiful colour.

First item of business was to cut the corner strips.


Eight of these were needed to cover the four corners.  In thin-ish strips like this, the African Blackwood can show brittleness at the ends, so I have cut all of them over length.

Next, the buttons for the corners had to be fabricated using scraps.

After squaring the pieces, the tops are defined and then the plug fashioned underneath them.


I suppose it was my frugal upbringing, but I have a tendency to not throw much away.  All those little offcuts are stored away against future need.  Never know when a little strip or piece of African Blackwood will be needed.


Here is the near finished product - basking in its first coat of lacquer.
A few more coats, sanding between each coat - then final assembly.
Woo Hoo!


Saturday, December 31, 2011

Happy New Year 2012


........... and a safe 2012 -  where you and yours find peace and contentment.

After love, forgiveness is the greatest act we can perform.

Thursday, December 29, 2011

Building the Wall Mirror - Part III

It seems an age since my last shed visit, and I have the joys and excitement of the festive season to thank for that.  BBQ's, grandkids, boardgames, poolgames, chess, and time with family - all the best things.

Home alone today so was able to put in some time on the Wall Mirror.


Before final clamp-up, it is important to establish that the frame is square.  Measuring each of the diagonals will determine this.  Each diagonal must be the same length.  I use two offcuts to each inside corner.  Place a mark across both pieces and repeat the measure for the other diagonal.  If there is any difference, then the frame has to be clamped across the diagonal and adjusted so that the measure is half the difference.

Mine was slightly out so a long pipe clamp did the trick.


Once the glue was dry, it was time to cut the rebate on the back to hold the plate glass of the mirror.  I used the trusty Makita with a small straight bit and a fence with a roller bearing.


The only problem in doing this with a router, is that it leaves a rounded rebate in each corner.  This can be cleaned up quite easily with a paring chisel.


This paring chisel is a long handled Japanese chisel, and is a delight to use.


The longer handle is usually used as a fine control in the angle and direction of the cut, where small movements at the handle end are translated to even finer adjustments at the blade.

The other advantage is that you can really lean on the chisel when necessary.


Once the corners were complete, it was time for a trial fit of the mirror.

Not too shabby at all!


I have cut a shallow groove at each corner to take a contrasting timber in the style of the great architects - Greene & Greene.

Well - maybe not quite their style - more like Greene & Greene via Telegraph Point.

That's all I had time for today.

Hopefully I can finish this over the weekend.

(If New Year's doesn't get in the way too much!)

Friday, December 23, 2011

Building the Wall Mirror part IIa

I really thought that I would be finished this project by now, but the fates have had other ideas.
A solid stint of babysitting with the grandchildren as well as the things that needed to be done by Xmouse, have all contributed to the delay.
As Old Blue Eyes would say ... That's Life!

I briefly re-visited the shed today on my way to other chores, and found a solution to my clamping problem.

I have been tossing around various ideas to solve the short clamps dilemma.  I just don't have enough clamps long enough to span the length of the mirror - essential for the glue-up.

Here is what I came up with:


This is a long mirror, so the table saw and router table were pressed into service as benchtops, and the gap between them became the pivot point for the solution.

I clamped a pair of cauls across the middle, and used my longest clamps from this point in both directions.
 The clamps pull against each other - with the top caul in between them to keep them straight.  One happy side effect is that I have adjustable clamping pressure at every corner.
I only had time for a dummy run this morning.  The real thing will have to wait until after Xmouse.
Cool!

I do hope that you all experience the love and fellowship that family, and this time of the year offers to us.  And remember ... nothing comes before family!

Happy Xmouse to all!